Zentyal Configuration
Follow this guide to setup and manage an AAltSys Server using Zentyal. Documentation for Zentyal itself is found at http://doc.zentyal.org/en.
Note
Your server is administered with Zentyal using the Firefox web browser, and other browsers may not work correctly. Specifically, versions of Microsoft’s Internet Explorer which do not conform to HTML5 standards cannot be used to administer Zentyal.
There are thee accepted ways to access Zentyal administration:
- At the server console, login to the system as the administrator, or
- At a local workstation, go to browser address https://__server.IP.address__, or
- At a local workstation, go to browser address https://__hostname__.
Login to Zentyal using your administrator __username__ and
__password__ to perform the following initial configuration steps.
Module Status
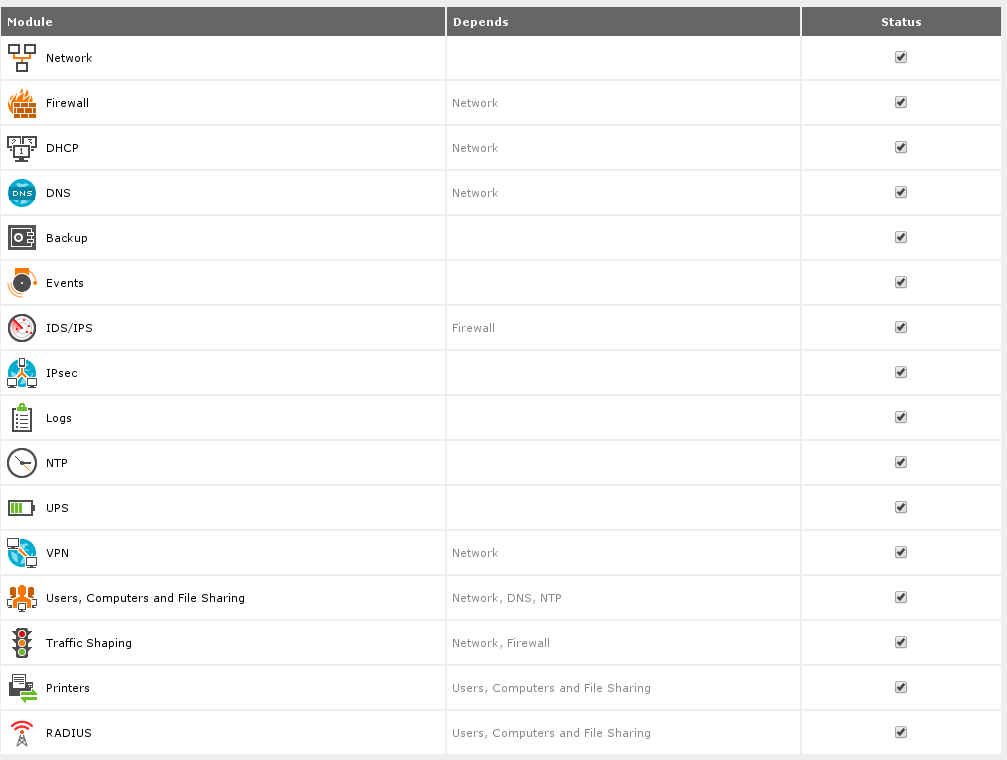
On the Zentyal menu, select Core ‣ Module Status. Check that
all installed modules are active; that is, that their statuses are checked. The
following image from a new install shows the DHCP module unchecked. (DHCP
should be checked only on servers used as network gateways.) After activating
modules, click on Save Changes in the top bar, and then click Save to
finalize the change.
General Information
Check the information on the System ‣ General page for any installation entry errors.
System Backup
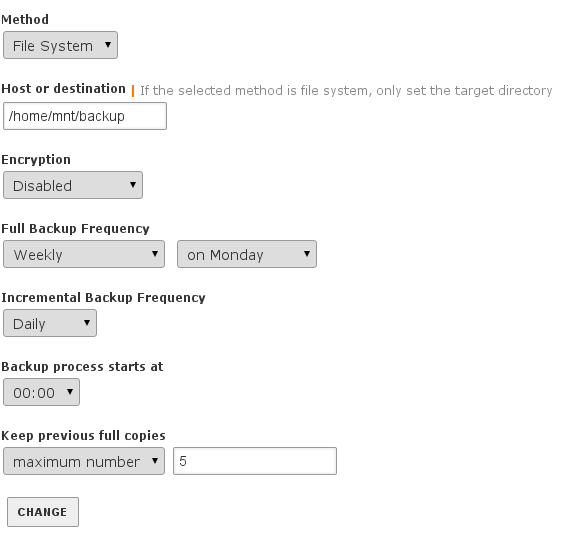
Configure backups at Core ‣ System ‣ Backup. Display the Configuration and Status tab, and set the following options to tell Zentyal how to backup:
| Setting | Value |
|---|---|
| Host or Destination | /home/mnt/backup |
| Full backup frequency | Monthly -- on the 1th |
| Keep previous full copies | maximum number -- 3 |
Below is a screen shot of these settings.
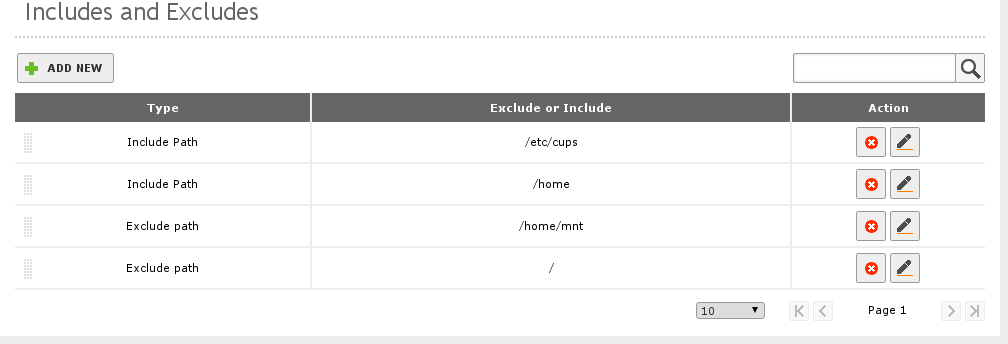
Now click the Includes and Excludes tab to tell Zentyal what to backup. Click Add new to add each of the following entries, going up from the bottom of this list:
| Type | Exclude or Include |
|---|---|
| Include Path | /etc/cups |
| Include Path | /home |
| Exclude Path | /home/mnt |
| Exclude Path | / |
Then delete any entries not on the above list, leaving the four lines displayed in the following image:
Network Interfaces
At Core ‣ Network ‣ Interfaces, There are two possible
configurations for the network interface eth0 depending on whether the
server will be used as a network gateway or as a peer on a LAN.
For network gateways, we recommend configuring eth0 with method DHCP,
and the External (WAN): box must be checked.
Note
When a gateway server is reconfigured from DHCP to
static, a default gateway record must be added as well. Changing from
static to DHCP requires deleting the default gateway first.
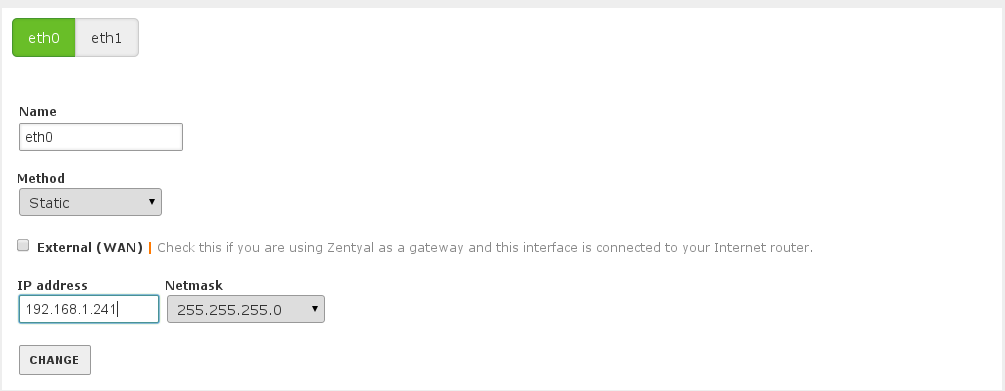
Where a server is a LAN peer, only eth0 should be connected. The interface
should be set to a static IP address, and the External (WAN): box
must not be checked. An example of this configuration is illustrated following.
More details on Zentyal networking are found at Server Network Setup.
Network Gateway
When eth0 is an external interface configured to obtain its IP address
through DHCP, Zentyal should configure the Internet gateway for your system as
the following example shows.

Network Services
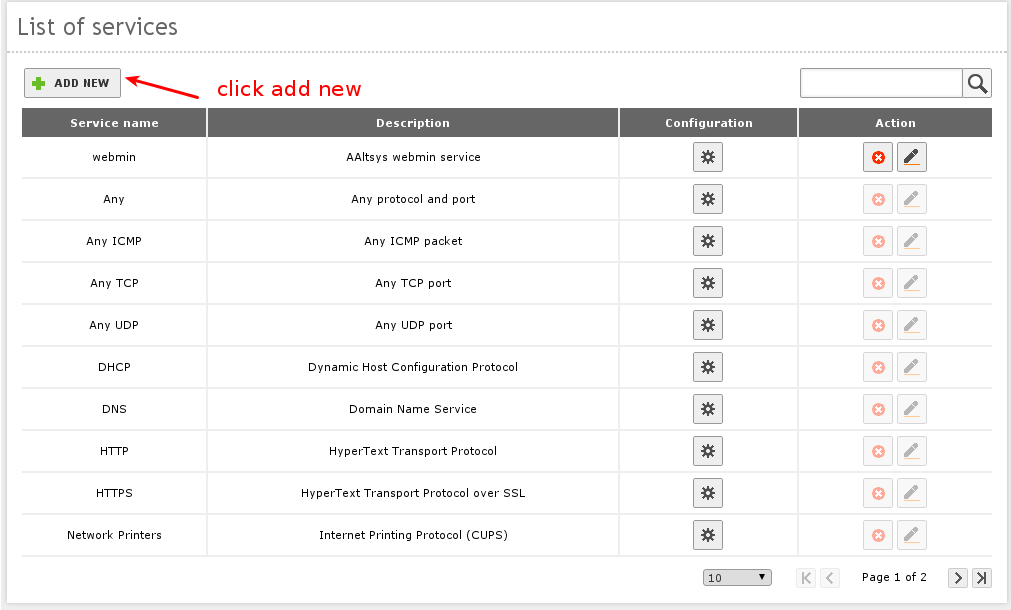
In section Core ‣ Network ‣ Services, a Network Service
definition must be added so that firewall rules can be created later. First
click add new to add the following service:
| Service Name | Description |
|---|---|
| webmin | AAltsys webmin service |
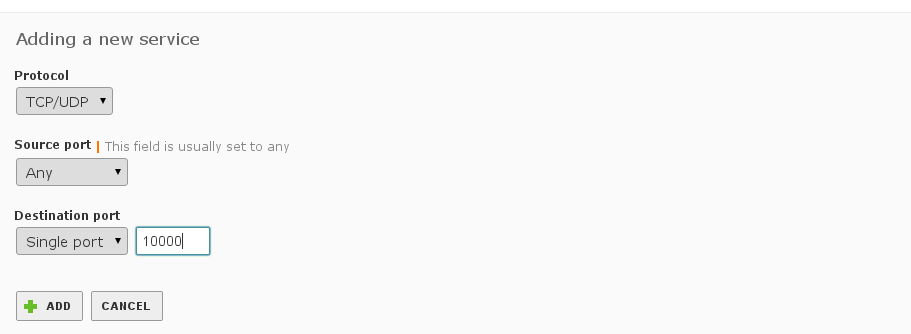
Once the new service is added to the list, click the Configuration
button for webmin and add a configuration for:
| Protocol: | TCP/UDP |
| Source port: | any |
| Destination: | Single port --> 10000 |
The resulting configuration is displayed following:
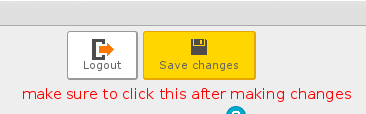
Tip
Remember to click Change when making configuration changes.And always save your changes.
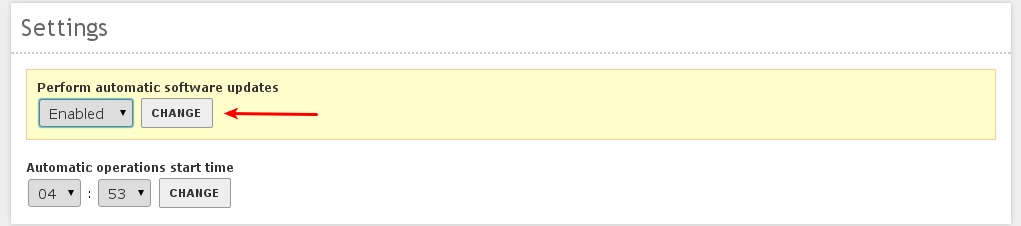
Software Management
At menu selection Core ‣ Software Management ‣ Settings:
for the setting Perform automatic security updates, choose
Enabled, and remember to click Change, as shown following.
Note
The Zentyal 3.0 Gateway menu section was formerly known as UTM.
Firewall Packet Filter
Select Gateway ‣ Firewall ‣ Packet Filter ‣ internal networks
to Zentyal on the Zentyal menu to insert a new firewall rule for the Network
Service defined previously. Click the Configure rules link below
Filtering rules from internal networks to Zentyal. Then click
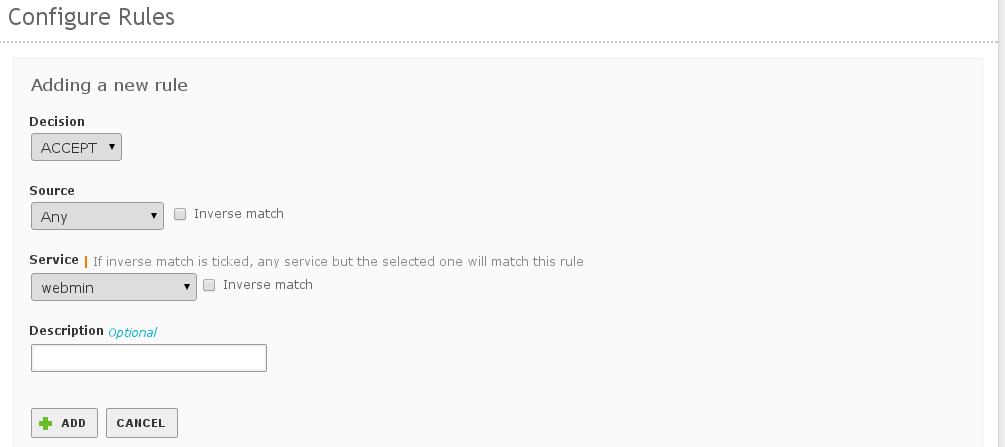
Add new to enter this rule:
| Decision | Source | Service | Description |
|---|---|---|---|
| ACCEPT | Any | webmin | (blank) |
The new rule will be positioned at the top of the list as shown following:
IDS
At Gateway –> IDS, check the Enabled box for eth0 in the Intrusion Detection System.
DNS
At Infrastructure ‣ DNS, click Add new under
Forwarders to add your ISP’s forwarding DNS entries, or enter IP
addresses for known good DNS servers. (Google DNS servers are shown here.)
Note
Zentyal 2.2: Click Add new under Domains to add a new
local domain, local.aaltsys.net, but do not enter an IP address.
The following image shows the resulting DNS page:

Note
The local.aaltsys.net domain is not checked as
Dynamic. This feature will be configured in the DHCP section
to follow.
- Click the configuration icon below Hostnames on the local.aaltsys.net domain.
- Click the configuration icon below Alias on the
__hostname__host, then clickAdd newto add a new alias. - Type a new alias
aaltsysserverfor this host, then clickaddto accept it.
DHCP
Note
Skip this section if you are not configuring a network gateway server.
Use section Infrastructure DHCP to configure interface
eth1. (Only static internal interfaces provide DHCP services.) Settings
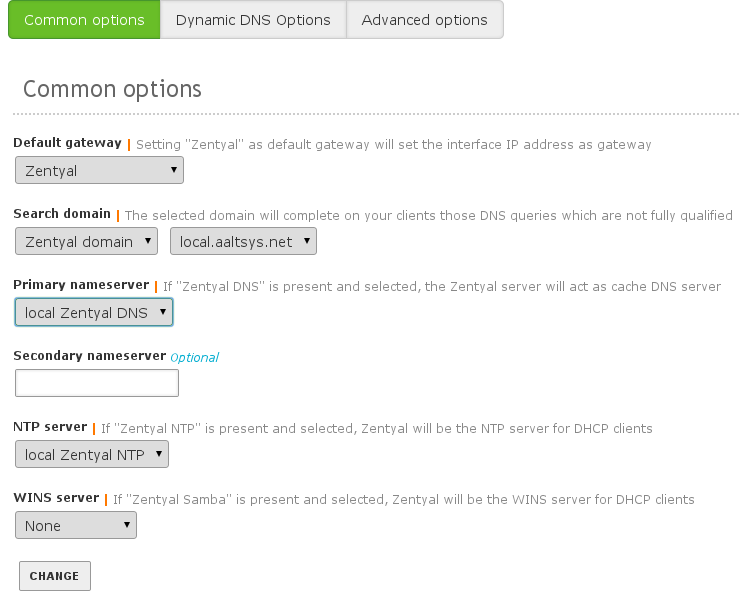
for the Common options follow:
| Option name | Setting value |
|---|---|
| Default gateway | Zentyal |
| Search domain | Zentyal domain --> local.aaltsys.net |
| Primary name server | local Zentyal DNS |
| Secondary name server | (IP of your DSL or cable modem) |
| NTP server | local Zentyal NTP |
| WINS server | none |
Tip
The Secondary nameserver value should be set to the IP address of your DSL or cable interface.
Click Change to save the Common options settings. The following
screenshot shows a DHCP configuration, where the cable modem uses IP address
192.168.1.254.
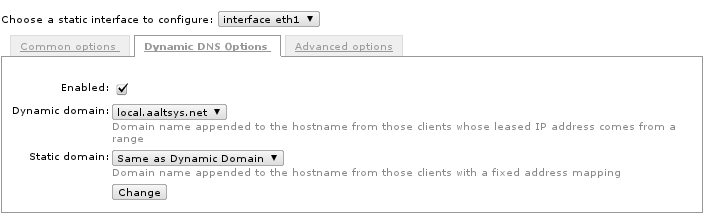
Click the Dynamic DNS Options tab on the DHCP page, and click the
Enabled: checkbox, and click Change. The settings on this page
should be:
| Option name | Setting value |
|---|---|
| Enabled | (Checked) |
| Dynamic domain | local.aaltsys.net |
| Static domain | Same as Dynamic Domain |
The following screenshot shows Dynamic DNS Options settings:
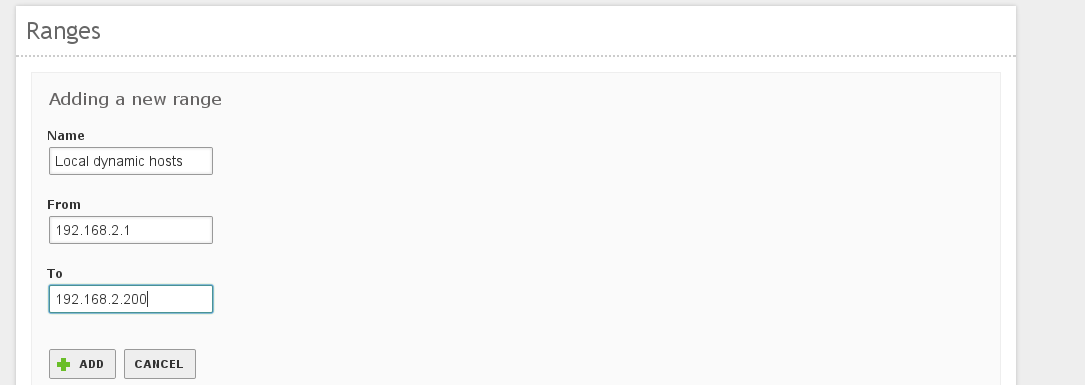
Under Ranges, click Add new to add an IP address range for
dynamic IP assignment in your local subnet. We recommend excluding addresses
above x.x.x.200 to provide static IP address space, so our default settings
are:
| Name: | Local dynamic hosts |
| From: | 192.168.2.1 |
| To: | 192.168.2.200 |
Click Add to complete the change. The result is displayed following:
Save Changes
Click Save changes in the Zentyal title bar, and under Save
configuration, click Save. Your server functions are configured, and now
office use can be set up.